Google Calendar Booking for Individuals and Small Businesses
Simplify your scheduling with Google Calendar booking. Easily set up appointment pages for clients to book time directly into your calendar.

How many customers are slipping away before you can answer?
Answer 4 quick questions and get a simple missed-call estimate for your business.
Answer with one tap. Contact details come after your result.
Here is the estimate.
Thanks. Your result was received.
Google Calendar booking pages, officially called Appointment Schedules, let clients book time directly into your calendar without any back-and-forth emails. The fastest path to a live link: open Google Calendar on desktop, click Create > Appointment schedule, set your duration and availability, hit Save, then copy the booking link from the event.
A few things to know before you start:
- Any personal Google Account can create basic appointment schedules.
- Advanced features, including Stripe payments, professional booking page customization, and extended reminders, typically require a Google Workspace or Google One subscription.
- Google announced a preconfigured booking page option in August 2025 that builds a booking page automatically from your weekday availability, so eligible users can skip manual setup entirely.
Pro Tip: If you already have a Google Workspace account, check whether the preconfigured booking page has been enabled for your organization. It can save you 10–15 minutes of initial setup.
Key Takeaways
Google Calendar booking pages give individuals and small businesses a free, fast way to accept appointments without email back-and-forth, but advanced features like Stripe payments and extended reminders require a Google Workspace or Google One subscription.
| Point | Details |
|---|---|
| Create on desktop only | Appointment schedules must be set up in a desktop browser; mobile apps do not support creation. |
| Enable availability checks | Turn on "Check calendars for availability" and mark all personal events as Busy to prevent double bookings. |
| Use buffers and lead time | Add buffer time between appointments and set a minimum scheduling notice to avoid back-to-back gaps. |
| Stripe payments need Workspace | Connecting Stripe to collect payment at booking requires an eligible Google Workspace Business tier subscription. |
| Ringport covers the phone gap | For 24/7 lead capture from callers who skip the booking link, Ringport's AI receptionist books appointments and follows up automatically. |
Table of Contents
- How to create a Google Calendar booking page step by step
- How to configure availability, buffers, and scheduling windows
- How to share and embed your booking page
- Payments, reminders, and reducing no-shows
- How to manage bookings, reschedules, and conflict rules
- When does Google Calendar booking make sense vs. a third-party scheduler?
- What's free vs. what requires Google Workspace
- Troubleshooting common booking issues and best practices
- When Google Calendar booking is the right tool for your business
- Ringport fills the gap Google Calendar booking can't cover
- Official documentation and recommended reading
- Sources
How to create a Google Calendar booking page step by step
Creating an appointment schedule requires Google Calendar on a desktop browser. The mobile apps do not support schedule creation.
Step-by-step setup:
- Go to calendar.google.com and sign in.
- Click the + Create button in the top-left corner.
- Select Appointment schedule from the dropdown menu.
- Enter a name for your booking page (e.g., "30-Minute Consultation").
- Set the appointment duration using the dropdown (15 minutes, 30 minutes, 1 hour, or a custom length).
- Configure your availability: choose which days and time windows you want to accept bookings.
- Add a location or conferencing link (Google Meet, phone number, or physical address).
- Customize the booking form by adding intake questions such as name, phone number, or a custom field.
- Click Next to review the booking page preview.
- Click Save to publish the schedule.
- Click Open booking page to see your live link, then copy and share it.
Testing your booking page:
- Copy the booking link.
- Open a private/incognito browser window or use a different Google account.
- Select an available slot and complete a test booking.
- Return to your main calendar and confirm the appointment appears as a blocked event.
- Check that both you and the test booker received confirmation emails.
Pro Tip: Run your test during a time slot you've intentionally left free. If "Check calendars for availability" is enabled, the test booking should block that slot across all linked calendars immediately.
How to configure availability, buffers, and scheduling windows
Getting your availability settings right is what separates a polished booking experience from a chaotic one. Google Calendar gives you several controls worth understanding before you share your link publicly.
Setting your available hours:
- Choose specific weekdays and time ranges under the Availability section of your appointment schedule.
- You can add multiple time blocks per day (e.g., 9 AM–12 PM and 2 PM–5 PM) to create a midday break.
- Use the copy icon to apply the same hours to other days quickly.
Appointment duration and multiple booking pages:
- Each appointment schedule has a single duration. If you offer a 30-minute intro call and a 60-minute deep-dive session, create two separate booking pages, one per service.
- Name each page clearly so clients know which one to use.
Buffer time and daily booking limits:
- Add buffer time between appointments (5, 10, 15, or 30 minutes) to give yourself a break between calls or sessions.
- Set a maximum number of appointments per day to prevent overbooking on busy days.
Minimum lead time and scheduling window:
- Minimum scheduling notice prevents last-minute bookings. Setting it to 24 hours, for example, means no one can book a slot starting tomorrow morning at 8 AM if it's already 7:45 AM today.
- Maximum scheduling window limits how far in advance someone can book. A 60-day window keeps your calendar from filling up with appointments months out that may not materialize.
Pro Tip: For solo operators, a 4-hour minimum lead time and a 30-day maximum window tend to strike the right balance between flexibility and control. Test these settings with a dry run before sharing the link with clients.
How to share and embed your booking page
Once your schedule is live, you have three ways to share your appointment schedule: a direct link, a popup button, or a full inline embed.
Direct link:
- Copy the booking page URL from the appointment schedule event on your calendar.
- Share it via email, text, your email signature, or social media profiles.
- You can also link to a page that shows all your booking pages at once, which is useful if you offer multiple services.
Button with popup:
- Google generates an HTML snippet that places a button on your website. When a visitor clicks it, your booking page opens in a popup overlay.
- This option keeps visitors on your page while they book, which tends to reduce drop-off.
Inline embed:
- The inline embed places the full booking calendar directly on a webpage.
- Google provides an HTML snippet with adjustable width and height attributes. Paste it into any website editor that accepts custom HTML.
Embedding requires access to your site's HTML editor. If your website uses a page builder that blocks raw HTML input, the inline embed will not render without developer access. In that case, the popup button is the more practical option.
Platform compatibility notes:
- WordPress: paste the snippet into an HTML block in the Gutenberg editor or a Custom HTML widget.
- Wix: use the Wix HTML iframe element in the editor.
- Squarespace: add a Code Block and paste the snippet there.
- Shopify: embed via a custom page template or a theme section that accepts HTML.
- Google Sites: use the Embed option under Insert.
Pro Tip: After embedding, always test the page in a private browser window to confirm the booking widget loads correctly for visitors who are not signed into Google.
Payments, reminders, and reducing no-shows
Collecting payment at booking and sending timely reminders are two of the most effective ways to reduce no-shows. Google Calendar supports both, though the depth of each feature depends on your account type.
Stripe integration:
- Workspace Business Standard and higher tiers support connecting a Stripe account to accept payments at the time of booking.
- You can require full payment or a deposit before a slot is confirmed.
- Stripe handles the payment processing; Google Calendar handles the booking confirmation.
Email confirmations and reminders:
- Booking confirmations are sent automatically to both you and the client when an appointment is scheduled.
- You can set up to 5 email reminders per appointment schedule (e.g., 24 hours before, 1 hour before).
- Editing the reminder email text is limited on free accounts; more customization is available with eligible Workspace subscriptions.
Tactics to cut no-shows:
- Require email verification for guests who are not signed into a Google account. This filters out casual or accidental bookings.
- Add a phone number field to your intake form so you can follow up directly if needed.
- Require a payment or deposit at booking. Paid appointments are far less likely to be abandoned.
- Stack multiple reminders: one the day before and one an hour before the appointment.
Note: Advanced reminder options and Stripe payment collection are tied to eligible Google Workspace or Google One subscriptions. Free Google Account users get basic confirmation emails but have limited reminder customization.
Pro Tip: Even if you don't charge for appointments, collecting a small refundable deposit through Stripe creates a psychological commitment that dramatically lowers no-show rates for service businesses.
How to manage bookings, reschedules, and conflict rules
Understanding how Google Calendar handles conflicts and notifications keeps your schedule clean and your clients informed.
What happens when someone books:
- A new event appears on your primary calendar with the client's name and any intake form responses.
- You receive an email notification for each new booking.
- If you've added a co-host, they receive a notification too, but co-host availability is not checked by default. You need to explicitly include their calendar in your availability check settings to prevent conflicts.
Conflict detection:
- When "Check calendars for availability" is enabled, Google scans your linked calendars and removes any slot where an existing event is marked Busy or where you've RSVPed Yes to another event.
- If you disable this setting, your booking page can show slots as open even when you have other events scheduled, which creates double-booking risk.
Rescheduling and cancellations:
- Clients can reschedule or cancel using the link in their confirmation email.
- When a booking is changed or canceled, both you and the client receive an updated email notification.
- You can also cancel or reschedule from your own calendar by editing the appointment event directly.
Workflow for small teams:
- Add buffer time between all appointments to absorb overruns.
- Include co-host calendars explicitly in your availability check settings.
- Mark personal commitments as Busy on your primary calendar, not just as free-time blocks.
- Periodically review your calendar for any events that are accidentally set to Free, which would allow bookings to overlap them.
When does Google Calendar booking make sense vs. a third-party scheduler?
The built-in appointment schedule works well for many small businesses, but it has real limits. Here's how it compares to other scheduling approaches.
| Feature | Google Calendar booking | Entry-level third-party tools | Full-featured scheduling platforms |
|---|---|---|---|
| Two-way Google Calendar sync | Native | Yes, via integration | Yes, via integration |
| Free plan available | Yes (basic) | Yes | Limited or trial only |
| Stripe payments | Workspace tiers only | Often included | Yes, with advanced options |
| Team features (round-robin, pooled availability) | Limited | Basic | Yes |
| Embed options | Button, popup, inline | Button or iframe | Button, popup, inline, custom |
| Best for | Solo users, simple flows | Small teams, light automation | Complex routing, branded experiences |
Tools like Calendly, Koalendar, and Appointlet all integrate with Google Calendar and offer features the native booking page doesn't, including round-robin scheduling, branded booking flows, and more granular payment controls. For practical workflow examples and integration notes, the Zapier guide to Google Calendar appointment schedules covers common workarounds worth reviewing.
Stick with Google Calendar booking when:
- You're a solo professional or a small team with straightforward scheduling needs.
- You want a booking page live in under 10 minutes at no extra cost.
- Your clients are already in the Google ecosystem and expect a familiar interface.
Consider a third-party scheduler when:
- You need round-robin or pooled availability across multiple staff members.
- You want a fully branded booking experience with custom domain and colors.
- You need advanced reporting, CRM integrations, or complex payment workflows.
- Automation between your booking tool and other business apps is a priority.
What's free vs. what requires Google Workspace
Knowing the account requirements upfront saves you from hitting a wall mid-setup.
Account requirements:
- Any personal Google Account can create appointment schedules and share a booking link.
- Google Workspace accounts (Business Starter, Standard, Plus, or Enterprise) unlock additional features, including Stripe payments, more booking page customization, and extended reminder options.
- Google One subscribers may also access some premium booking features depending on their plan.
Mobile limitations:
- Appointment schedules must be created and edited on a desktop browser. The Google Calendar mobile apps for Android and iOS do not support schedule creation.
- Clients can book from mobile without any issue; the limitation applies only to the schedule owner's setup workflow.
Feature limits to know:
- Free Google Account users are limited in the number of booking pages they can create simultaneously.
- Resource calendars (room-booking or facility calendars) cannot be used for appointment schedules. If you need to automate room or equipment bookings, you'll need a separate workflow.
- Reminder email text editing is restricted on free accounts.
- Payment collection via Stripe requires an eligible Workspace subscription.
For teams considering a Workspace upgrade, a Google Workspace migration or setup partner can help you configure admin controls, calendar sharing permissions, and booking page settings correctly from day one, which is especially useful for businesses with multiple staff calendars.
Troubleshooting common booking issues and best practices
Most problems with Google Calendar booking pages fall into three categories: double bookings, missing confirmation emails, and embed display failures.
Fixing double bookings:
- Confirm that "Check calendars for availability" is turned on in your appointment schedule settings.
- Verify that all personal and work events on your calendar are marked Busy, not Free.
- If you have a co-host, explicitly add their calendar to the availability check so their conflicts are factored in.
- Review any recurring events that might be set to Free by default.
Fixing missing confirmation emails:
- Check your Google Calendar notification settings and confirm email notifications are enabled.
- If you use a secondary calendar for appointment schedules, verify that email routing is set up correctly for that calendar.
- Ask the client to check their spam or promotions folder.
- Confirm the client entered a valid email address in the booking form.
Fixing embed display issues:
- Verify the HTML snippet is pasted into an HTML-capable block, not a plain text or rich-text editor.
- Check the width and height values in the snippet. A width set to 100% usually works across screen sizes.
- Test the embedded page in a private browser window to rule out caching issues.
- If the embed still doesn't render, switch to the popup button option as a reliable fallback.
Ongoing best practices:
- Keep a separate "blocked time" calendar for personal commitments and include it in your availability checks.
- Use buffer time and minimum lead time consistently, not just when you remember to.
- Require email verification for anonymous bookings to filter out low-intent submissions.
- Test your full booking flow at least once a month, especially after making any changes to your schedule settings.
Pro Tip: Set a recurring monthly calendar reminder to test your own booking page. Settings can drift after Google updates, and catching a broken embed or misconfigured availability window before your clients do saves real headaches.
When Google Calendar booking is the right tool for your business
Google Calendar's built-in booking pages are genuinely good for a specific kind of business: solo professionals, freelancers, and small appointment-based teams who need a clean, functional scheduling page without paying for another subscription. A therapist, consultant, or personal trainer who books multiple appointments weekly can get everything they need from the native tool, especially now that the preconfigured booking page removes most of the friction from setup.
Where I see businesses outgrow it is the moment they need 24/7 lead capture. A booking link only works if the person who wants to book actually clicks it. Callers who reach voicemail at 9 PM, or leads who find you through a Google search on a Sunday, rarely circle back to fill out a form later. That gap between inbound interest and a confirmed appointment is where revenue quietly leaks.
For businesses that rely heavily on phone calls, combining Google Calendar booking with a receptionist service or an AI-powered call handler closes that gap. The booking page handles the self-serve traffic; the receptionist layer captures everyone else and routes them into the same calendar. Teams with complex routing needs, multiple staff members, or high call volume will also find that third-party scheduling platforms give them more control over how bookings are distributed and followed up.

The honest answer is that Google Calendar booking is a strong starting point, not a ceiling. Use it to get your scheduling off the ground, then layer in additional tools as your volume and complexity grow.
Ringport fills the gap Google Calendar booking can't cover
Google Calendar booking handles the clients who find your link and book themselves. But what about the caller who rings at 7 PM, or the lead who texts after hours and never gets a response? Those contacts rarely convert on their own.
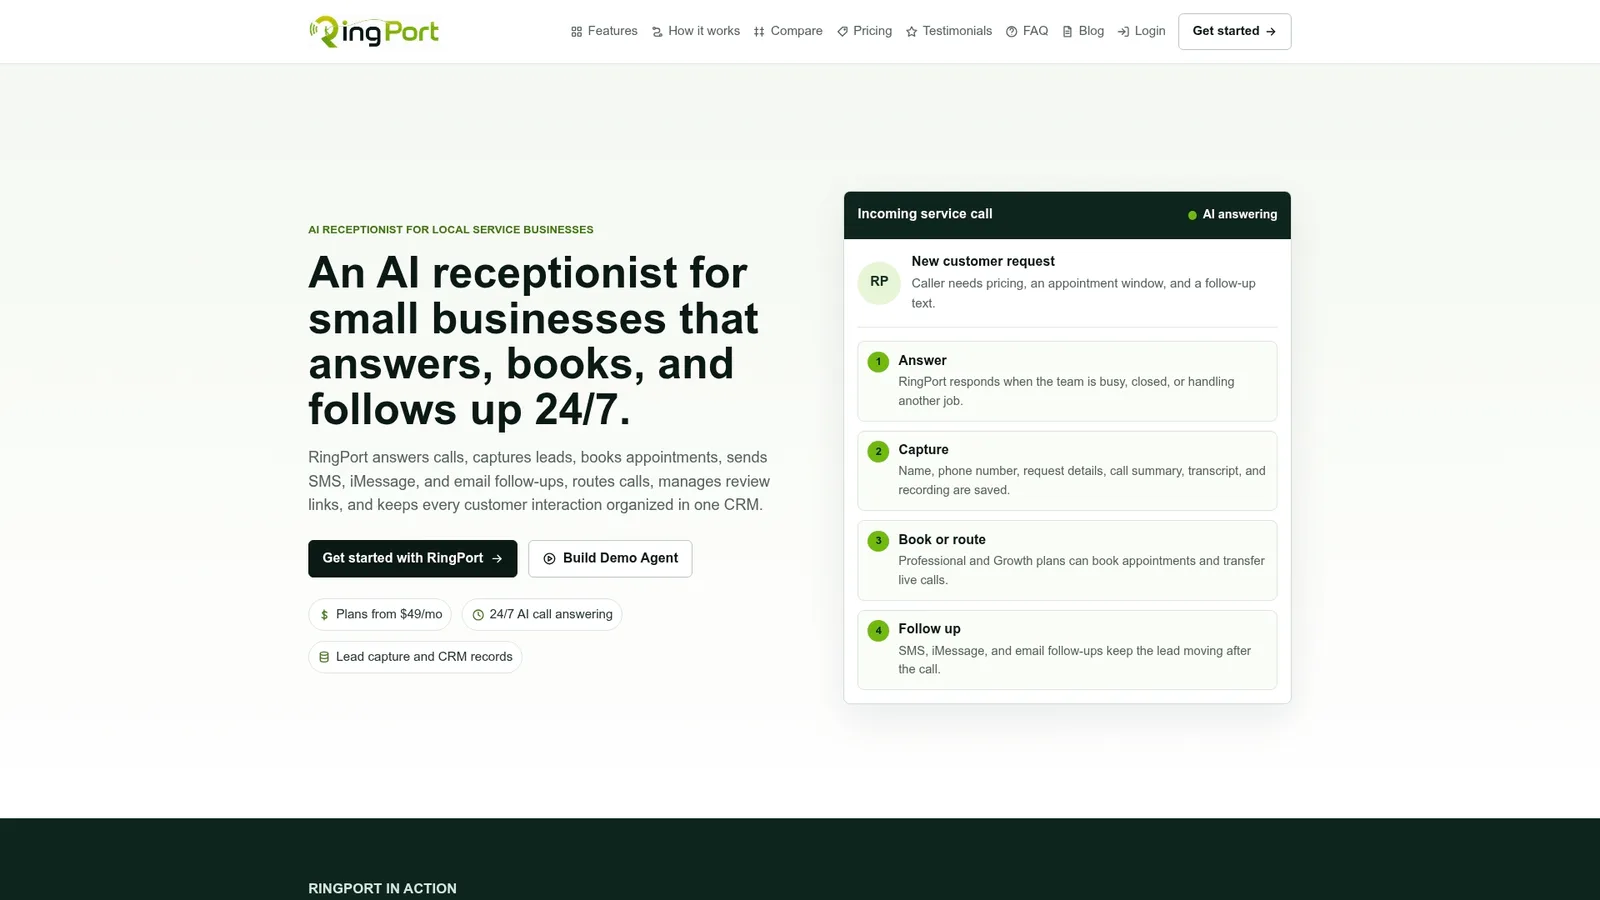
Ringport is an AI receptionist built for local service businesses. It answers calls 24/7, books appointments directly into your calendar, and triggers CRM follow-ups automatically so no lead falls through the cracks. Where Google Calendar booking ends, Ringport picks up: it captures the callers who would never have clicked your booking link, qualifies them, and gets them onto your schedule without you lifting a finger. You keep your Google Calendar booking page for self-serve clients and let Ringport handle the inbound call volume that happens outside business hours.
Visit Ringport to see how it works and start a free trial.
Official documentation and recommended reading
The sources below are the most reliable references for verifying setup steps, feature eligibility, and recent updates.
- Create an appointment schedule: Google's official step-by-step guide covering the desktop creation flow, duration settings, availability configuration, and mobile limitations.
- Share your appointment schedule: Instructions for copying your booking link, generating the popup button HTML, and embedding the full booking page on external websites.
- Edit your appointment schedule: Covers conflict detection, the "Check calendars for availability" setting, and how Busy events interact with booking slots.
- Learn about appointment schedules (Google Workspace Individual Help): Explains which features, including advanced reminders and Stripe payments, are gated behind Workspace or Google One subscriptions.
- Google Workspace appointment scheduling overview: Product-level summary of Workspace booking capabilities, Stripe integration, and Business tier features.
- Preconfigured Google Calendar booking page announcement: Google's August 2025 Workspace Updates post announcing the automatic booking page setup based on weekday availability.
Start with the official Google Calendar Help pages before relying on third-party tutorials. Google updates its Calendar interface regularly, and the official documentation reflects the current UI and feature set more accurately than most blog posts written before 2025.
Sources
- Share your appointment schedule - Computer - Google Calendar Help
- Create an appointment schedule - Google Calendar Help
- Learn about appointment schedules in Google Calendar - Google Workspace Individual Help
- Edit your appointment schedule - Computer - Google Calendar Help
- Online Appointment Scheduling with Google Calendar | Google Workspace
- Let others easily book time with you using the new pre-configured Google Calendar booking page